
How to integrate Power Hub with InPost?
Integrating Power Hub with the InPost carrier allows you to create and track shipments. Below you will find instructions on how to connect both systems step by step.
1. Obtain access credentials for the InPost API
To start the integration, log in to your account at https://manager.paczkomaty.pl/, and then:
- Go to the “My account” tab.
- Make sure that your company address details and invoicing details are completed
- Select the “API” tab.
- Generate a new ShipX API key.
- Copy the organisation ID and token – they will be needed during configuration in Power Hub.
2. Log in to Power Hub
- Go to the website app.powerhub.pl.
- Log in to your account or register if you do not have an account yet.
3. Add the InPost integration
After logging in:
- Go to the Configuration → Integrations section.
- In the side menu, go to the Carriers tab.
- Click Add.
- Select InPost from the list.
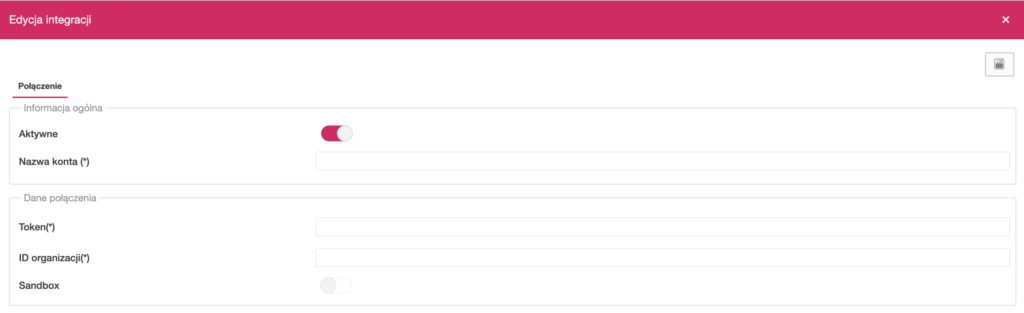
- Enter your own integration name (e.g. “InPost – main account”).
- Paste the token and organisation ID obtained when generating access to the ShipX API.
- Save the settings.
4. Template settings
After a successful connection, you can configure shipment templates by selecting a specific sender address, primary service and additional services within them. Templates are required to create shipments in Power Hub. How to configure shipment templates.
To edit a previously created template, double-click on its name.
5. Creating shipments
You can create shipments:
- From the order view, using the data contained within it. How to create a shipment for an order.
- Manually, by entering the required data yourself. How to create a shipment manually.
All shipments after creation can be found in the Shipments → Shipments summary. section.
While creating a shipment, you can modify the template settings.
6. Tracking shipments
In the Shipments → Shipment tracking section, you will find a list of shipments that have already been dispatched with the carrier. You can check their current status there.