
GLS account configuration in PowerHub
To start using the integration with the courier company GLS, you need to configure the connection in the PowerHub system. Below you will find step-by-step instructions.
1. Go to the Configuration / Integrations tab
From the list of carriers, select GLS, then click Add or Edit if you already have an active account.
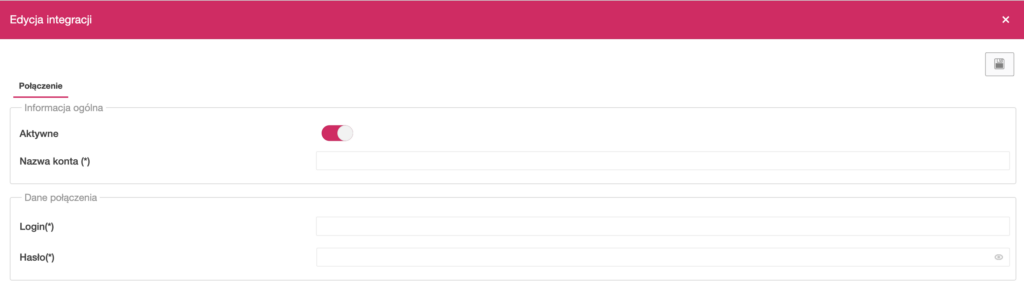
2. Complete the details in the Connection tab
The configuration form consists of two sections:
General information:
- Active – enable to activate the integration.
- Account name – enter any name that will allow you to identify the given GLS account.
Connection details:
- Login – GLS user identifier (usually contains a string of digits and the suffix api).
- Password – the password assigned to the GLS account.
These access details should be provided by the GLS account manager or the company’s IT department.
3. Save the data
After completing all required fields, click the floppy disk icon in the top right-hand corner to save the settings and activate the integration.
4. (Optional) Go to the “Shipment templates” tab
After saving the configuration, you can define shipment templates that will be used when creating labels for GLS (e.g. default shipment type, weight, additional options).