
DHL account configuration in PowerHub
To use the integration with the courier company DHL, you must first activate and configure your account in the PowerHub system. Below you will find step-by-step instructions.
1. Go to the Configuration / Integrations tab
From the list of carriers, select DHL, then click the Edit or Add button if you do not yet have an account created.
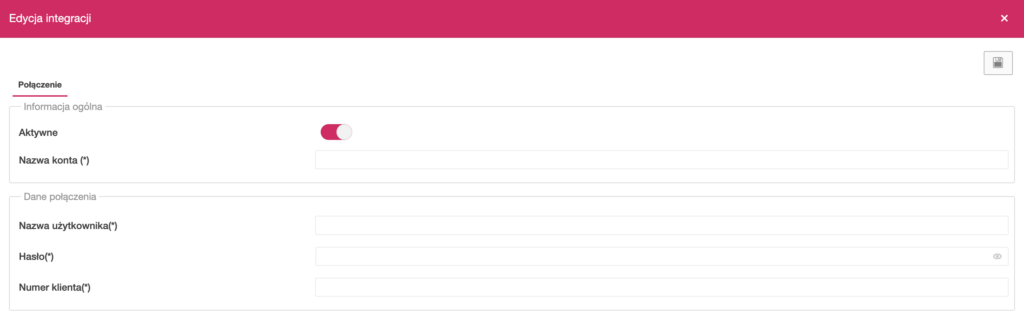
2. Complete the “Connection” section
In the configuration form, you will find two sections: General information and Connection details.
General information:
- Active – switch to activate the connection.
- Account name – enter the name visible in the system
Connection details:
- Username – login for the DHL account (assigned by DHL).
- Password – password assigned to the DHL account
- Customer number – unique customer number assigned to your company by DHL.
Note: you will receive all the above information from your DHL account manager or the DHL eCommerce support team.
3. Save the configuration
After entering the details, click the floppy disk icon in the top right-hand corner to save the account settings.
4. (Optional) Go to the “Shipping templates” tab
Once the details have been saved correctly, you can define your own shipment templates for DHL – e.g. default parcel type, contents, or shipping method.